Configuration Settings Executable Control
The Configuration Settings Executable Control node contains five tabs; Trusted Owners, Options, Validation , Application Termination and Access Limits.
In this section:
Trusted Owners
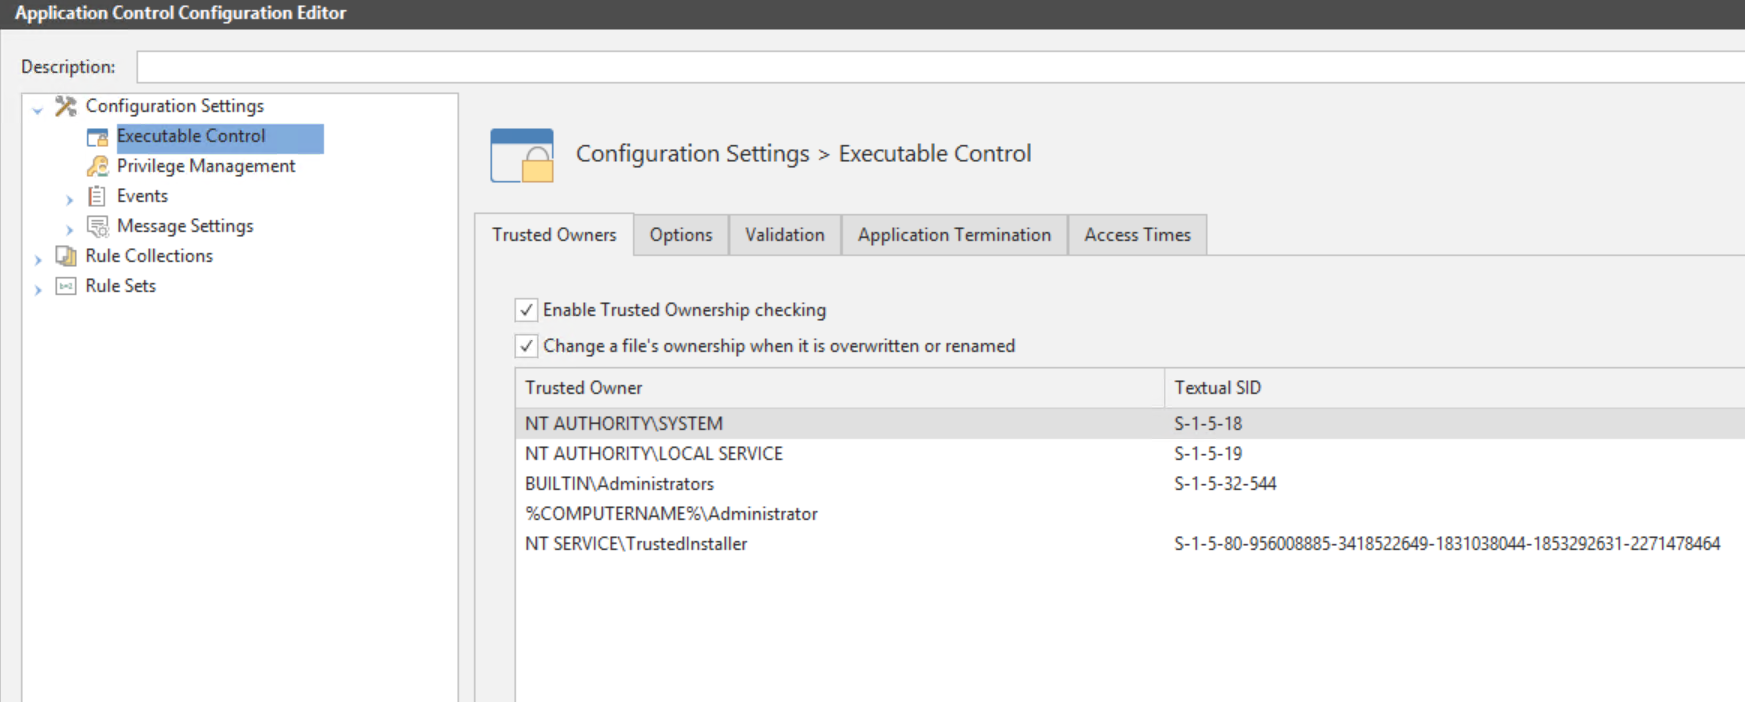
Navigate to Configuration Settings > Executable Control > Trusted Owners tab.
- Enable Trusted Ownership checking - Select to enable Trusted Ownership checking. Selected by default.
- Change a file's ownership when it is overwritten or renamed - Select to change the ownership of any trusted allowed file which is overwritten by an untrusted user, who is not in the Trusted Owners list.
When a denied file is renamed by an untrusted user, in an attempt to bypass a denied item rule, the ownership is changed to the untrusted user. Once the ownership has changed, Trusted Ownership checking then prevents the file from being executed.
Caution: Do not remove all Trusted Owners. This would result in no application on the system being trusted and standard users unable to run anything.
When the option Change a file's ownership when it is overwritten or renamed is selected, Application Control selectively changes the NTFS file ownership of executable files when they are overwritten or renamed.
Attempts by a user who is not a Trusted Owner to overwrite a file that is allowed due to Trusted Ownership or an Allowed Item rule, could constitute a security threat if the file contents have changed. Application Control changes the ownership of an overwritten file to the user performing the action, making the file untrusted and ensuring that the system is secure.
Likewise, attempts to rename a denied file to the name of an allowed item could also constitute a security threat. Application Control also changes the ownership of these files to the user who performs the rename action and ensures the file remains untrusted.
Overwrite and rename actions are both audited.
Add a Trusted Owner
- In Configuration Settings > Executable Control > Trusted Owners tab right-click in the work area and select Add.
- The Add trusted Owners dialog displays.
- Enter or browse to select the user name to add.
- Click Add. The user is now added to the list together with the unique SID.
Test Trusted Ownership
A quick test to show Trusted Ownership working:
- Introduce one or more applications using a test user account.
- Copy one or more applications to the user’s home drive or another suitable location, such as calc.exe from the System32 folder or copy a file from a CD.
- Attempt to run a copied file. The application is denied because the files are owned by the test user and not a member of the Trusted Owners list.
You can verify the ownership of a file by viewing the Properties using Windows Explorer.
Options

The table below lists all possible options and a description for what each option does:
|
Option |
Description |
|---|---|
|
Make local drives allowed by default |
Select this option to make Application Control configurations deny lists. Everything on the local drive is allowed unless it specified in the Denied Items list, or it fails trusted ownership. Deselect this option to make the configuration an allow list. Everything on the local drive is blocked unless it is specified in the Allowed Items list. An allow list configuration is the most secure. However, this type of configuration is time consuming to make and can affect the client stability as all unspecified applications are blocked. |
|
Allow cmd.exe for batch files |
It is expected that administrators explicitly prohibit cmd.exe in their Application Control configuration. When cmd.exe is denied and 'Allow cmd.exe for batch files' is disabled, batch files will be evaluated and blocked if they fail the Application Control policy. If the option is not selected and cmd.exe is explicitly denied, all batch files are blocked, they aren't even evaluated. If this option is selected and cmd is explicitly denied, cmd.exe still can't be run on its own, but batch files are evaluated against Application Control rules. If cmd.exe is not explicitly denied, all batch files run no matter whether this option is ticked or not. |
|
Ignore restrictions during logon |
During logon the computer may execute a number of essential applications. Blocking these can cause the computer to function incorrectly, or not at all. Hence, this option is selected by default. |
|
Extract self-extracting ZIP files |
A self-extracting file is an executable that contains a ZIP file and a small program to extract it. These files are sometimes used as an alternative to installing an application by an MSI file. A number of administrators prefer applications to only be installed by an MSI file. Only self-extracting EXEs formatted using the ZIP specification are supported. For additional information, see ZIP Specifications The Extract self-extracting ZIP files option allows a denied executable file, which is a self-extracting ZIP file, to be extracted by the ZIP Extractor. If this option is deselected (the default setting) the file is subject to the normal rule processing as though it is an executable file. Once the contents have been extracted, any executable content it contains is still subject to the normal Trusted Ownership checks and is prevented from executing if the user is not a Trusted Owner. This is useful for scenarios where the self-extracting ZIP file may contain non-executable content such as a document that the user requires. By default, this option is deselected, and the self-extracting ZIP file is treated as a standard executable and can be prevented from executing (and hence extracting its contents) subject to the normal rule processing. |
|
Ignore Restrictions during Active Setup |
By default, all applications which run during Active Setup are subject to Application Control rules. Select this option to make these applications exempt from rules checks during Active Setup phase. |
|
Deny files on removable media |
Deselect this option to remove the restrictions on removable media. Removable media is whatever the call to GetDriveType determines it to be. Due to the nature of removable media, the drive letter may change depending on how an endpoint is setup. For example: On one computer the removable media drive may be identified as the E: drive and on another F: |
|
Deny files on network shares |
The configuration default for network shares is an allow list, meaning that everything on the network share is denied unless it is specified in the Allowed Items list. Deselect this option to make the configuration a deny list, so that everything on the network share is allowed unless it fails trusted ownership checking or is specified in a Denied Items list. |
Validation
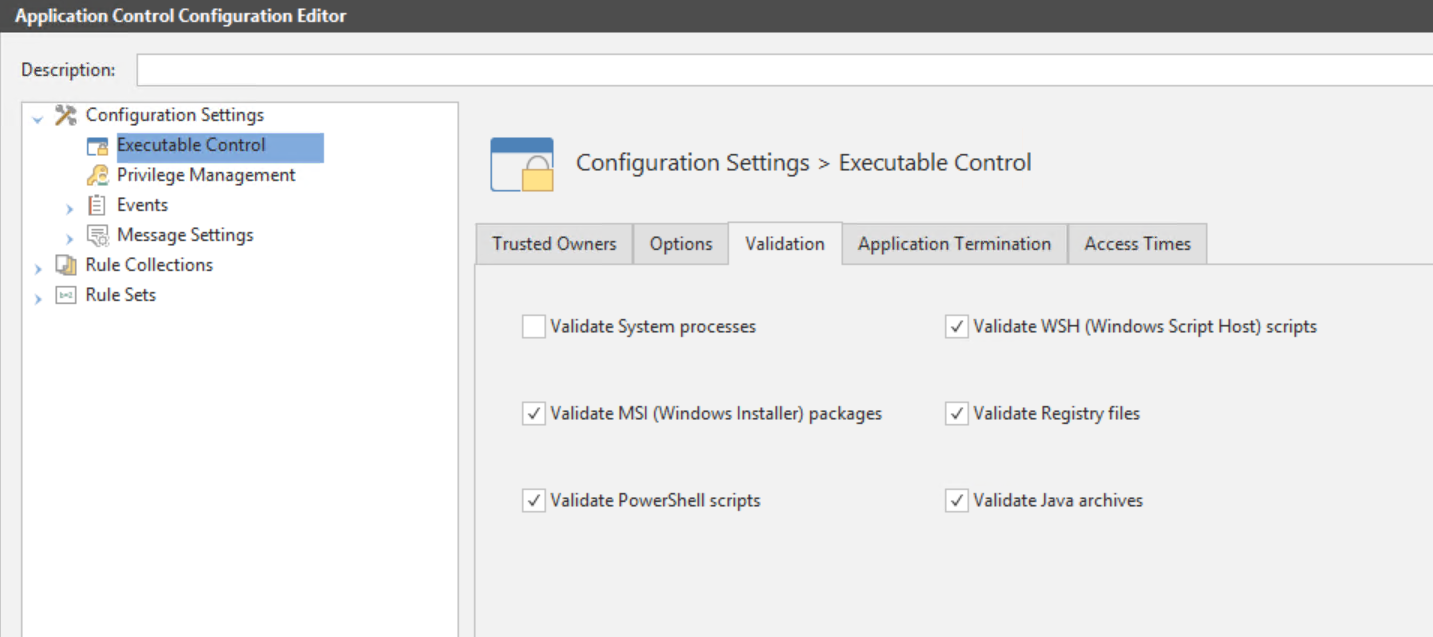
The table below lists all validation options together with a description.
|
Option |
Description |
|---|---|
|
Validate System processes |
Select this option to validate any files executed by the system user. Note that it is not recommended to select this option as it increases the amount of validation occurring on the endpoint computer and can block crucial applications from running. Selecting this option means all executables launched by the system are subject to rule validation. |
|
Validate WSH (Windows Script Host) scripts |
Selecting this option specifies that the command line contents of scripts ran using wscript or cscript are subject to rule validation. Scripts can introduce viruses and malicious code. It is recommended to validate WSH scripts. |
|
Validate MSI (Windows Installer) packages |
MSI files are the standard method of installing Windows applications. It is recommended that the user is not allowed to freely install MSI applications. Selecting this option means all MSIs are subject to rule validation. Deselecting this option means that only the Windows installer itself, msiexec.exe, is validated by the Application Control rule processing, and not the MSI file that it is trying to run. |
|
Validate Registry files |
Select this option to enable rule validation for regedit.exe and regini.exe. Deselecting this option means that the regedit.exe and regini.exe, is no longer blocked by default. Additionally, the .reg script, the regedit.exe and regini.exe it is trying to run is no longer validated by Application Control rules processing. It is not recommended to allow users to access the registry or registry files. |
|
Validate PowerShell scripts |
When enabled, this setting denies powershell.exe and powershell_ise.exe. However, if a PowerShell script (PS1 file) is found on the command line, then, it is subjected to a full rules check to see if it is configured for elevation, allowed, or denied. |
|
Validate Java archives |
When enabled, this setting denies java.exe and javaw.exe. However, if a Java archive (JAR file) is found on the command line, then, it is subjected to a full rules check to see if it is allowed or denied. |
Application Termination
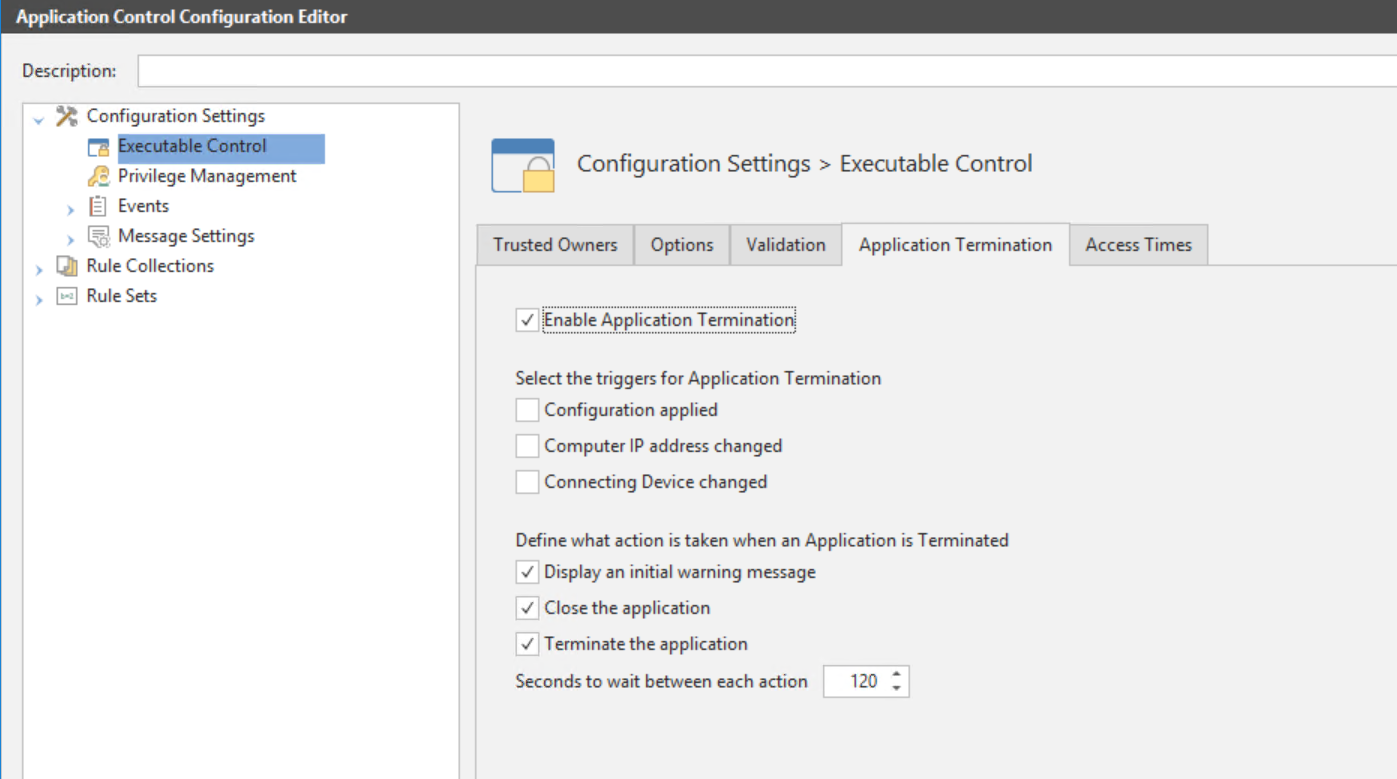
Application Termination allows you to control triggers and behavior for terminating applications on managed endpoints. You can terminate applications gracefully, allowing the user to save work before closing, or force a termination.
Application Termination is disabled by default. To enable the feature select Enable Application Termination on the Configuration Settings > Executable Control > Application Termination tab.
Triggers for terminating an application include the following:
- A new configuration is applied
- The computer IP address changes
- The connecting device changes
When a trigger is activated, processes are evaluated against the rules to determine if an application requires terminating. Rules with Self-Authorizing and Audit Only security levels are not evaluated because Self-Authorizing rules allow user discretion over application control and Audit Only rules do not apply Application Control control.
Configure Triggers for Application Termination
|
Option |
Description |
|---|---|
|
Configuration applied |
Select to terminate an application according to the configuration that is applied |
|
Computer IP address changed |
Select to terminate an application when the IP address of the computer changes, for example, moving between secure and insecure environments. See example. |
|
Connecting Device changed |
Select to terminate an application when the connecting device has changed, for example, changing from a desktop to a laptop in the same session. |
Example: Computer IP Address Changed
Use Application Termination to terminate an application when the IP address has changed. For example, when the IP address is out of the company range of IPs.
- Enable Application Termination in Configuration Settings > Executable Control > Application Termination tab.
- Select the Computer IP address changed option.
- Define which of the following actions are taken on termination:
- Display an initial warning message
- Close application
- Terminate application
You can select all three options and set the time to wait, in seconds, between each action, up to a maximum of 120 seconds.
This step is to set up the IP address range that is allowed for the work office.
- Select the Rule Sets node in the navigation pane.
- Select Device and right-click to display the shortcut menu.
- Select Add Device Rule Set.
A child node is created under the Device node. - Click in to the new node to rename, or highlight, right-click > Rename.
- Enter an intuitive name, for example, In Office.
- Right-click in the work area to add a device to the rule set. Select Host Name or IP Address.
- The Add aClient Device dialog displays.
- Enter an IP address range that is allowed and click Add.
This step is to set up the IP address range that is not allowed, for example, when using VPN from another location.
- Go through the steps to create a new Device Rule Set as you did in Step 2.
- Enter an intuitive name, for example, Out of Office.
- Right-click in the work area and select Add Client Device.
- The Add a Client Device dialog displays.
Do one of the following:
- Enter the IP address range that is not allowed.
- Enter *.*.*.* to imply all other IP addresses.
- Click Add.
Click Save the configuration.
Configure Actions taken on Application Termination
|
Option |
Description |
|---|---|
|
Display an initial warning message |
Displays an initial warning message to inform the user that the denied application will be closed and to save any work. The time to close can be specified using the Seconds to wait for... option. Use in conjunction with the Close Application and Terminate Application options. If this is not used in conjunction with these options, a message is displayed and the denied application does not close. |
|
Close the application |
Closes the application following the initial warning message, allowing the user time to save their work. |
|
Terminate the application |
Terminates the denied application without giving the user a warning message. |
|
Seconds to wait between each action |
Specifies the time period, in seconds, between actions, and also the time between closing and terminating. The maximum period is 120 seconds. |
Access Times
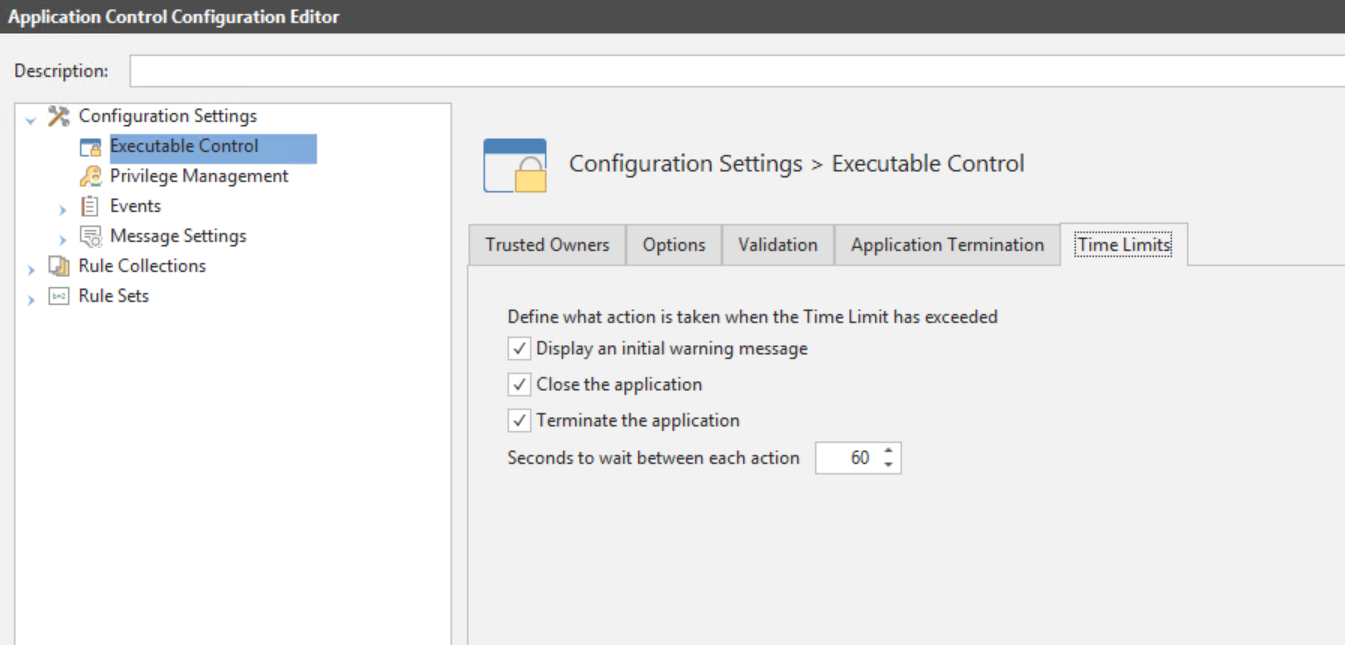
If an application has exceeded the allowed access times you can specify what action to take; for example, you can also specify whether the user is allowed to save their work before closing the application, or to just close the application upon the warning:
Display an initial warning message - Select to display an initial warning message to the user when an application has exceeded time limits. Typically, this gives the user time to save their work and close the application. Use in conjunction with the Close application and Terminate application options. If you do not use this in conjunction with these options, only a message is displayed and application does not close.
Close the application - Select to send a close message to the application. When most applications receive a close message they automatically give the user a chance to save their work. Select along with the Display an initial warning message option.
Terminate the application - Terminate the application without allowing the user to save their work. Typically, this is used after the application has been sent a close message but has failed to terminate. Choose to select the Display an initial warning message or not, the application will terminate regardless.
Seconds to wait between each action - Specify the number of seconds to wait between each of the selected termination options. For example, if the user selects all three of the termination options and then selects 20 seconds, the warning message will be displayed, followed 20 seconds later by the close message and finally the application terminates after a further 20 seconds. The default is set at 60 seconds.
Access Times can be specified for File, Folder and File Hash Allowed Items.